TL;DR
- n8n is an open-source workflow automation tool that connects your apps and services
- It's a great alternative to tools like Make.com, Zapier, and Microsoft Power Automate.
- Self-hosting gives you complete control over your data and workflows
- We cover 13 different methods to set up n8n, from 3-minute deployments to custom configurations
- Each approach has pros and cons based on your technical comfort and needs
Self-host n8n when you handle sensitive data, need custom nodes, want predictable costs at scale, or already manage infrastructure. Use n8n Cloud when you want zero-ops setup or run fewer than 5,000 executions per month. A minimal self-host runs on a $5-$10 VPS and handles tens of thousands of executions monthly. The fastest path is a one-click deploy on Railway or Render (under 5 minutes), with Docker Compose on a VPS (15-30 minutes) as the balanced choice for most teams. Self-hosting is the right answer for automation agencies and privacy-sensitive workloads. It is overkill for solo users with light volume.
Why Workflow Automation Matters (And Why n8n Should Be Your Go-To Solution)
In today's fast-paced digital landscape, manually transferring data between systems or performing repetitive tasks isn't just tedious-it's a productivity killer. Enter n8n (pronounced "n-eight-n"), the open-source workflow automation platform that's changing the game for businesses and individuals alike.
Unlike other automation tools that lock you into their ecosystems, n8n puts you in control. By self-hosting n8n, you maintain complete ownership of your data, customize to your heart's content, and potentially save thousands in subscription costs.
Whether you're a developer looking to streamline your workflow or a business owner aiming to automate repetitive tasks, this guide will walk you through the best ways to set up your very own n8n instance in minutes, not hours.
What Makes n8n Special?
Before diving into setup methods, let's understand what sets n8n apart:
- 400+ integrations with popular services and applications
- Fair-code licensed - open source with some commercial limitations
- Visual workflow builder combined with custom code flexibility
- AI-friendly - build automation workflows with AI components, use custom AI agents, and MCP Servers.
- Self-hostable - keep your data on your own infrastructure
n8n combines the approachability of no-code platforms with the power of custom scripting when you need it. Think of it as the Swiss Army knife of AI and automation tools-versatile, reliable, and always ready for action.
Method 1: Let Buildberg Host Your n8n Instance
Perfect for: Business owners, teams, and individuals who want to get started quickly and don't want to deal with the hassle of self-hosting.
- Send us an email at usama@buildberg.co
- We'll create a n8n instance on our servers and give you a URL to access it.
- You can start building workflows immediately.
- We handle all the hosting, maintenance, and updates.
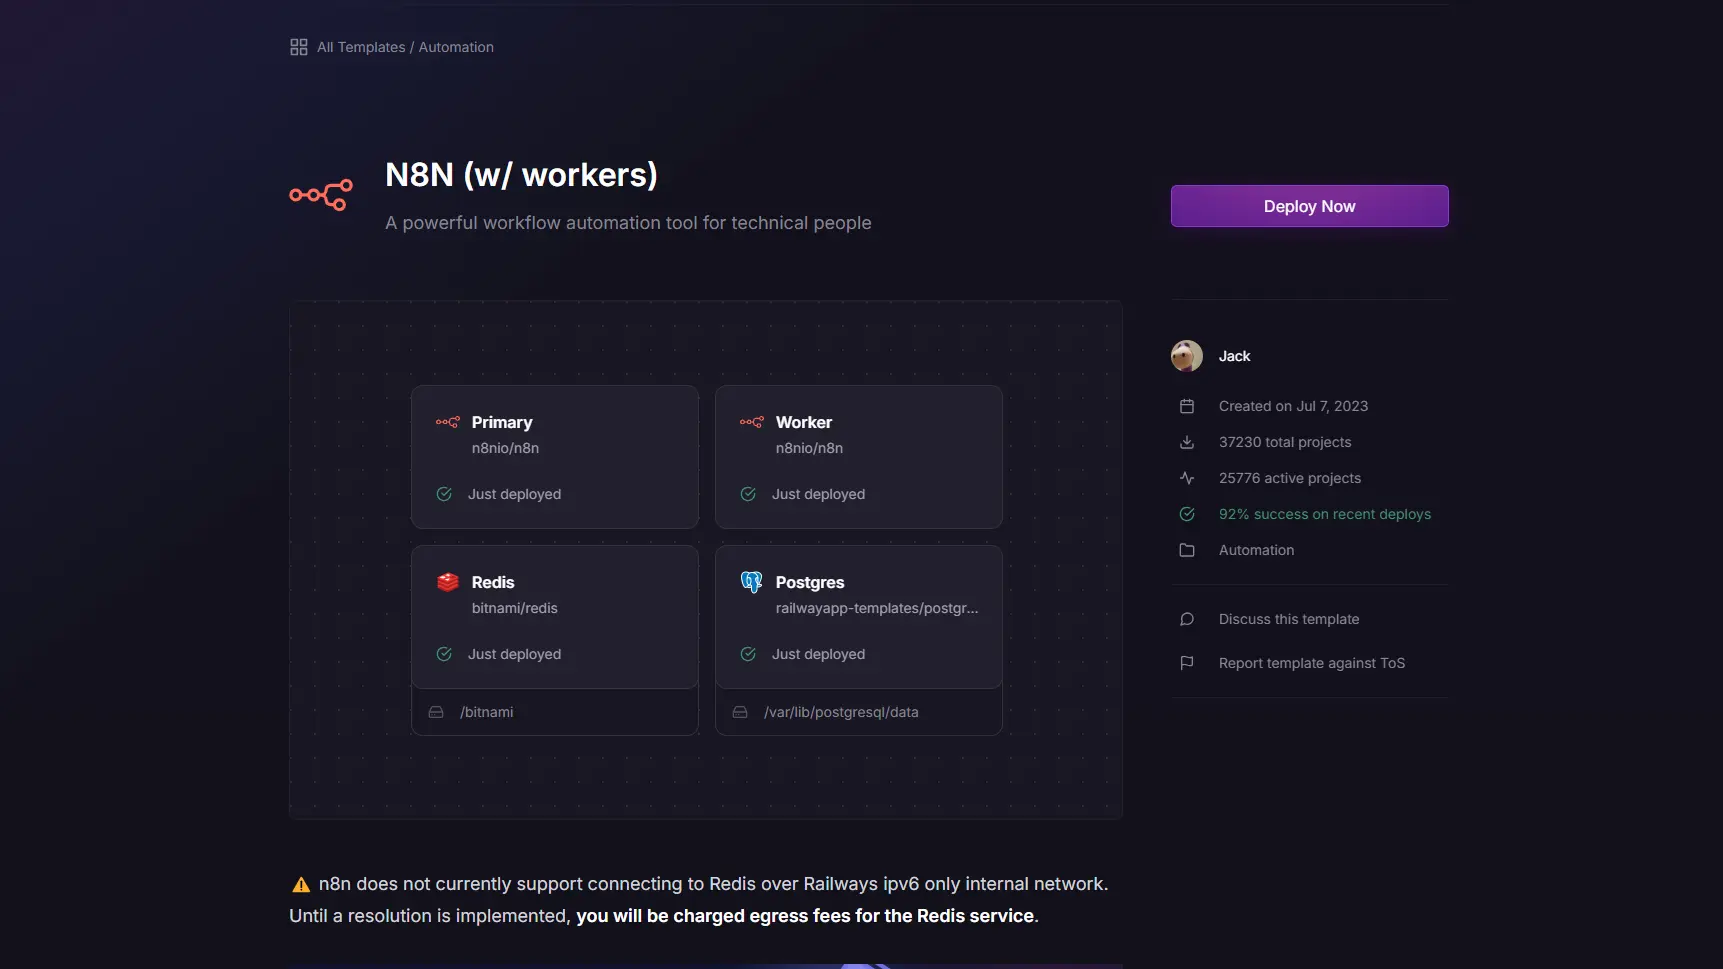
Method 2: Run n8n on Railway
Perfect for: Developers with GitHub accounts, scaling needs
Railway offers another streamlined deployment option with some added bells and whistles:
- Sign up for Railway using your GitHub account
- Select "Deploy a template" and search for "n8n with workers"
- Click "Deploy" and let Railway handle the rest
Method 3: The 3-Minute Setup with Render
Perfect for: Beginners, quick testing, or those who want the fastest possible setup
If you're looking for the absolute quickest way to get started with n8n, Render is your answer. Here's how to deploy n8n in just 3 minutes:
- Create a Render account at render.com
- Select "Deploy a service" and choose "Existing Image"
- Paste
docker.n8n.io/n8nio/n8nin the Image URL field - Select your pricing plan (Free tier available for testing)
- Click "Create Service"
Once deployed, Render provides you with a unique URL to access your n8n instance. Simply click the link, create your owner account, and you're ready to start building workflows!
Pro Tip: While the free tier is great for testing, it automatically spins down after inactivity. For production use, consider the Starter plan ($7/month) to avoid this limitation.
Method 4: Digital Ocean One-Click Deployment
Perfect for: More technical users who want granular control
Digital Ocean offers a balance between simplicity and control:
- Create a Digital Ocean account
- Go to Marketplace and search for "n8n"
- Create an n8n droplet
- Set up a domain and DNS records to access your instance
While requiring a few more steps than Render or Railway, Digital Ocean's approach provides more configuration options and potentially better performance for high-volume workflows.
Method 5: Heroku Deployment
Perfect for: Those already familiar with the Heroku ecosystem
Heroku offers a convenient GitHub-based deployment:
- Find the n8n Heroku GitHub repository
- Click the "Deploy to Heroku" button
- Configure your encryption key and application name
- Let Heroku handle the deployment
Although slightly more complex than Render, Heroku's tight GitHub integration makes it attractive for developers already working within that ecosystem.
Method 6: Local Deployment with Docker
Perfect for: Developers, testing environments, maximum privacy
Running n8n locally gives you the ultimate control:
- Install Docker Desktop on your computer
- Search for and pull the n8n image
- Configure and run the container
- Access n8n at localhost:5678
For external access and webhooks, you'll need additional configuration with tools like ngrok, making this approach better suited for development environments or internal use.
Method 7: Hostinger VPS Template
Perfect for: Long-term hosting with managed infrastructure
Hostinger offers a VPS-based approach:
- Sign up for Hostinger
- Select the n8n VPS template
- Configure your server settings
- Access your n8n instance through the provided URL
While potentially more expensive than cloud-based options, Hostinger's approach offers the stability of a dedicated VPS with the convenience of a one-click setup.
Method 8: npm with ngrok (Developer-Friendly)
Perfect for: Node.js developers, local development with webhook support
For those comfortable with Node.js, this method provides a straightforward way to run n8n locally:
- Install Node.js (version 18+) from nodejs.org
- Install n8n globally via npm:
npm install n8n -g - Start n8n by running:
n8n start - Access n8n at http://localhost:5678
To make your local n8n instance accessible from the internet (for webhooks):
- Create an ngrok account
- Install ngrok and authenticate
- Run
ngrok http 5678to create a public tunnel to your local instance
This approach is excellent for development environments and gives you full control over your n8n installation without containerization.
Method 9: CloudStation Templates
Perfect for: Managed hosting with advanced configurations
CloudStation provides template-based n8n deployments with different levels of complexity:
- Sign up at cloud-station.io
- Visit the template store and select an n8n template ("N8N Light" or "N8N Advanced")
- Deploy using the platform's one-click process
- Access your instance via the provided URL
CloudStation's standout feature is its "N8N Advanced" template that includes Redis caching for improved performance, making it suitable for heavy-duty automation workflows.
Method 10: Docker Compose with Traefik
Perfect for: Self-hosted deployments with SSL/TLS, production environments
This method leverages Docker Compose with Traefik as a reverse proxy to handle routing and automatic SSL certificate management:
- Install Docker and Docker Compose on your server
- Create a project directory:
- Create an
.envfile with your configuration:DOMAIN_NAME=example.com SUBDOMAIN=n8n GENERIC_TIMEZONE=Europe/Berlin SSL_EMAIL=user@example.com - Create a
docker-compose.ymlfile with Traefik and n8n services - Create a
local-filesdirectory for file storage - Start the stack with:
This approach provides a production-ready setup with automatic SSL/TLS certificate issuance and renewal, secure headers, and proper data persistence.
Method 11: Traditional VPS Setup (Advanced)
Perfect for: System administrators, custom infrastructure requirements
For complete control, you can manually set up n8n on any VPS provider (AWS, DigitalOcean, Linode, etc.):
- Provision a VPS with Ubuntu 20.04+
- Install Node.js and npm
- Clone the n8n repository or install via npm
- Set up a process manager like PM2:
npm install pm2 -g - Configure PM2 to manage n8n:
pm2 start n8n --name n8n - Set up Nginx as a reverse proxy with SSL via Let's Encrypt
- Configure proper firewall rules
While more complex, this approach provides maximum flexibility for production environments and integration with existing infrastructure.
Method 12: Hetzner Cloud Deployment
Perfect for: Cost-effective production hosting with European data centers
Hetzner offers affordable VPS options with excellent performance for hosting n8n:
- Create a server in the Hetzner Cloud Console selecting the "Docker CE" app image
- SSH into your server and install Docker Compose:
- Clone n8n's Docker/Caddy configuration:
- Create Docker volumes:
- Configure your DNS with an A record pointing to your server
- Edit the
.envandcaddy_config/Caddyfilefiles with your domain information - Start n8n with
docker compose up -d
Hetzner provides excellent price-to-performance ratio, especially for users looking for European-based hosting options.
Method 13: npm for Production with PM2
Perfect for: Node.js developers, customized hosting setups
For developers who prefer using npm but need production-ready stability:
- Install Node.js v18+ on your server
- Install n8n globally:
npm install n8n -g - Install PM2 process manager:
npm install pm2 -g - Create a PM2 configuration file (ecosystem.config.js):
- Start n8n with PM2:
pm2 start ecosystem.config.js - Set up Nginx as a reverse proxy with SSL (via Let's Encrypt)
- Configure PM2 to start on system boot:
pm2 startup && pm2 save
This approach gives you the control of npm while adding the process management, monitoring, and resilience features of PM2.
Choosing the Right Method for Your Needs
| Method | Setup Time | Technical Difficulty | Cost | Best For |
|---|---|---|---|---|
| Railway | 5 minutes | ⭐⭐ | Free-$10/mo | GitHub users, scaling needs |
| Render | 3 minutes | ⭐ | Free-$7/mo | Quick testing, beginners |
| Digital Ocean | 10 minutes | ⭐⭐⭐ | $5/mo+ | Technical users, custom domains |
| Heroku | 7 minutes | ⭐⭐ | Free-$7/mo | GitHub integration |
| Docker (local) | 5 minutes | ⭐⭐⭐⭐ | Free | Development, max privacy |
| Hostinger | 10 minutes | ⭐⭐ | $3.95/mo+ | Long-term stability |
| npm + ngrok | 8 minutes | ⭐⭐⭐ | Free-$10/mo (ngrok) | Node.js developers |
| CloudStation | 10 minutes | ⭐⭐ | Varies | Performance-focused setups |
| Docker Compose + Traefik | 25 minutes | ⭐⭐⭐⭐ | $5/mo+ | Production with SSL |
| Traditional VPS | 30+ minutes | ⭐⭐⭐⭐⭐ | $5/mo+ | Full customization |
| Hetzner Cloud | 15 minutes | ⭐⭐⭐ | $3-6/mo | European hosting, cost-effective |
| npm + PM2 | 20 minutes | ⭐⭐⭐⭐ | $5/mo+ | Node.js production |
Data Security and Self-Hosting Considerations
When self-hosting n8n, data security becomes your responsibility. Here are some key considerations to keep in mind:
Database Options
n8n supports multiple database backends:
- SQLite: The default option, great for testing but not ideal for production workloads
- PostgreSQL: Recommended for production environments and larger deployments
- MySQL/MariaDB: Also supported with proper configuration
For production environments, PostgreSQL offers the best performance and reliability, with features like:
- Better concurrency handling
- More robust data integrity
- Improved backup options
- Better performance with complex workflows
Encryption Keys
Always set a strong encryption key using the N8N_ENCRYPTION_KEY environment variable. This key is used to encrypt sensitive data like:
- API keys
- Access tokens
- Passwords
- Other credentials
If you lose this key, you'll lose access to all encrypted credentials, so make sure to back it up securely.
Backup Strategy
Implement a regular backup strategy for:
- The database (PostgreSQL, SQLite, etc.)
- The
.n8ndirectory containing your encryption key - Any file storage used by n8n
For Docker deployments, this means backing up your volumes. For npm installations, back up the .n8n directory in your home folder.
Scaling Considerations
As your usage grows, consider:
- Horizontal scaling: Using multiple n8n worker instances
- Vertical scaling: Increasing resources (CPU/RAM) for better performance
- Database optimization: Tuning PostgreSQL for your workload
- Queue implementation: Using Redis or similar for workflow execution queuing
Beyond Setup: Making the Most of Your n8n Instance
Once your n8n instance is up and running, you'll want to explore these key areas:
- Security - Set up proper authentication and consider SSL for production environments
- Backups - Regularly export your workflows to prevent data loss
- Updates - Keep your n8n instance updated for new features and security patches
- Environment Variables - Customize your instance's behavior with environment variables
For detailed configuration options, refer to the official n8n documentation.
Real-World n8n Use Cases
To spark your imagination, here are some practical ways organizations are using n8n:
- Content Publishing Workflows - Automatically post blog content to social media platforms
- Customer Data Synchronization - Keep CRM and marketing platforms in sync
- Automated Reporting - Generate and email reports based on data from multiple sources
- Inventory Management - Get alerts when stock levels reach specified thresholds
- Event-Triggered Actions - Execute workflows when specific events occur in your systems
The Bottom Line: Self-Hosted Automation Is Within Reach
Self-hosting n8n doesn't have to be complicated or time-consuming. With the methods outlined in this guide, you can have your own workflow automation platform up and running in minutes, not days.
Whether you prioritize simplicity, control, or cost-effectiveness, there's an n8n deployment method that fits your needs. Start small with Render's 3-minute setup, then scale to more robust options as your automation needs grow.
The best part? Your data remains yours, your workflows stay under your control, and your automation possibilities become virtually limitless.
Ready to Get Started?
Choose your preferred method from this guide and take the first step toward workflow automation freedom. Have questions or need help troubleshooting your n8n setup? Drop us an email at usama@buildberg.co